JMP Social - Google Configuration
Follow the steps below to configure your page to be able to login/register with your Google account:
1. Visit https://console.cloud.google.com/ > Login to Google by your account.
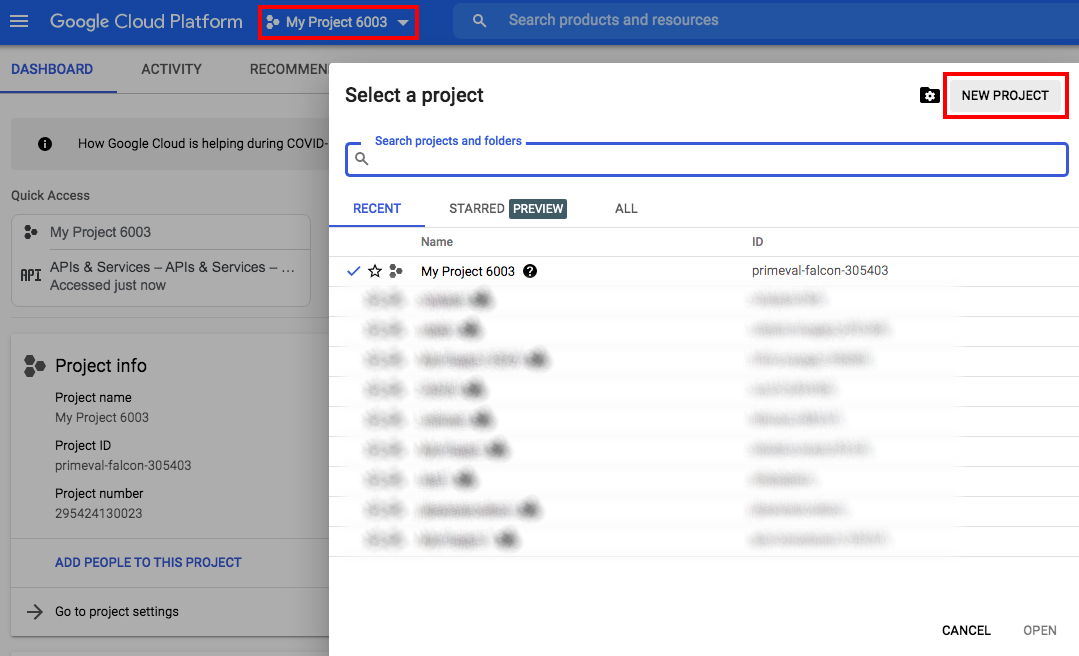
2. Select Manage Project > New Project > Fill Project Name > Create

3. Wait for the project creation process to complete > Select newly created project to continue
4. Navigation Menu > APIs & Service > Credentials > OAuth consent screen

5. Set User Type is External
6. Fill out all required information > Save and Continue
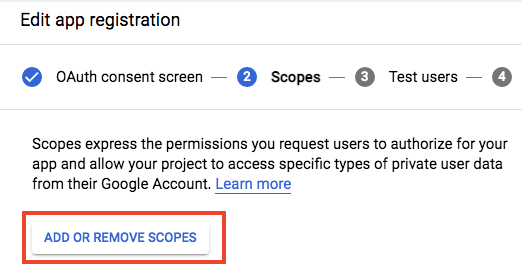
7. Click Add or Remove Scopes

8. Select userinfo.email and userinfo.profile > Update
9. From Sidebar > Credentials > Create Credentials > OAuth Client ID

10. Select Application type is Web application
11. Add the value to URIs in Authorized redirect URIs. (This value is taken from System - JMP Social plugin > Google Redirect URIs )

12. Click Create button to complete
13. Copy Your Client ID, Your Client Secret to the plugin configuration.

JMP Social is a plugin of JoomHelper that allows users to use social media accounts to quickly login/register on Joomla site.

What is wrong?
That imported page keeps on saying this, but nothing further is happening...
1. The "radio buttons" extra field doesn't transfer the values in the additional field, e.g., "yes" or "no," and only enters certain values into the #__fields_values database.
2. The "textarea" extra field with the "Use editor" option checked converts to "textarea" when it should be "editor."
3. In K2, the extra field group is assigned in the category. In Joomla Articles, the category is assigned in the extra field. It would be nice if this were automatically completed. A checkbox could be added if someone doesn't want this option.